You have surely heard the term Microlearning many times. But how can you actually implement the method in a course? We provide you with practical tips and show you with an example how it works!
The Ultimate Microlearning Guide for Online Courses
Kickstart your own Microlearning course! In our new guide, you'll learn step by step how to create your own online course in the Microlearning style. With plenty of helpful tips, tricks, and examples.
As a quick reminder: Microlearning describes learning in small chunks. The method aims to simplify the learning process by breaking the content into small learning units. This increases the motivation of course participants – and consequently also the learning success!
That's all well and good – you have probably heard the definition before. But do you know how to use Microlearning for the training of your employees? Below, we show you a real example course that demonstrates how easy it is to implement Microlearning and what you should consider.
Basics: What Makes Good Content for Microlearning?
Learning content in the sense of the Microlearning method should meet the following four characteristics:
Good Microcontent is…
simple and accessible from any device.
individual tailored to your participants.
precise and gets to the point.
part of a larger learning concept.
You should always keep these characteristics in mind when creating learning content. Precision and simplicity are the keys to learning success!
Another advantage of this structure is the quick repeatability. Short learning units can be accessed again at any time, allowing participants to specifically review content. This strengthens the transfer of learning and helps anchor knowledge long-term.
Here's another reading tip for you: 3 Rules for Creating Learning Bites
Good content also requires suitable media to achieve the desired learning effect. Because not every content is suitable for every medium. For example, processes should not be represented in text but rather rely on videos or task simulations.
These media and methods are well-suited for Microlearning content:
Infographics present information clearly and more easily.
Quizzes are suitable for testing and reviewing learning content.
Videos under 3 minutes in length are ideal for short attention spans.
playful learning content, e.g., through gamification, stimulates the desire to play.
Practical examples and real scenarios connect theory and practice.
Simulated tasks immerse the learner in a real learning environment.
Tip: If your content is more extensive, you can easily split it into multiple learning units!

Learning units in accordance with the Microlearning method: Simply split content into multiple pieces.
Of course, you don’t have to limit yourself to one medium, because most can be easily combined. Before we start with the example, we have one more piece of assistance for you.
5 Tips for Your Microlearning Course
1. Each learning unit should always include one core message:
If your content to be conveyed is more extensive, split it into several small units. Otherwise, your participants’ attention will suffer.
2. The processing time for each learning unit should not exceed two minutes:
“A blink should last no longer than two minutes. Some trainers set the limit at five minutes, but based on our experience, two minutes is better. More than two minutes is no longer fun for me as a participant and doesn’t hold my attention.” – Konstantin, founder of blink.it.
You can find more information about this in the article “The 2-Minute Concept”.
3. The chosen medium should fit your learning units:
To convey information quickly, videos, graphics, or quizzes are especially recommended. To ensure your statements are precise, a speaker timer (a tool for structuring videos in 60 seconds) is a good support. You should limit quizzes to three to four short questions; you can incorporate them more frequently into your course.
4. Test your online course before you pass it on to your participants:
Once your course is complete, you should check the actual processing time. You can either work through the course yourself or find a “test learner.” Stop the time and also get external feedback.
5. Do not publish your learning content all at once:
To avoid overwhelming your course participants, you should release your learning content one after the other. Time your chapters and prefer to regularly publish short learning units rather than overwhelm participants with a complete course.
Now we can start with the example:
Practice: This is what your Microlearning Online Course can Look Like
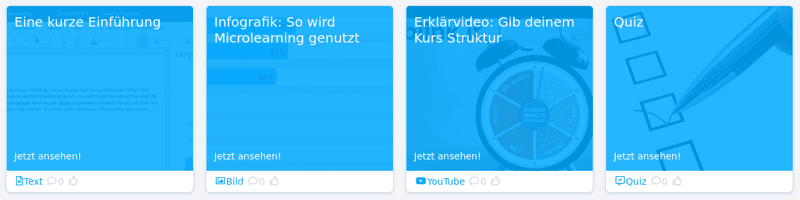
Step 1: The Introduction
For a friendly introduction, you should welcome your participants in advance and announce the intended learning goal. A short introductory video in which you explain what your course offers them would be suitable. This should not be too long and should generate enthusiasm for the upcoming course.
In an additional learning unit, you can summarize the learning objective or provide a rough outline in keywords. And then you can start your online course in the Microlearning format!

Own illustration 1: Example course for your Microlearning / Introduction and Welcome
Step 2: Compiling the Learning Bites
Next, you can start with your first learning unit. Combine different media for each topic. Each unit should be as short as possible and convey only one core message.
End the chapter with a short quiz with a maximum of 2-4 questions (depending on the number of previous learning units). This allows participants to test whether they truly understood the content. You can apply this structure for an unlimited number of chapters and topics!
Basic Structure: Content - Content - Content - Quiz
Own illustration 2: Example course for your Microlearning / Combining media and including quizzes
Step 3: Timing and Conclusion
To prevent your course participants from being overwhelmed by the amount of learning units, you should unlock them gradually. Depending on the capabilities of your software, you can either unlock the content directly one after the other or at specific times. This also ensures that the participants work through the learning units in the correct sequence and do not skip any topics.
For a successful conclusion to your online course, a short test is advisable. This way, you can see whether your participants have successfully completed your course. After passing the test, you can hand them a certificate confirming their participation. This also contributes to motivation during the learning process!
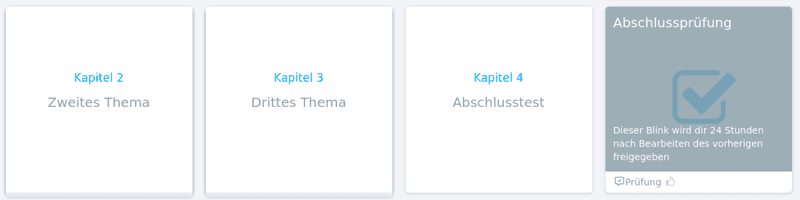
Own illustration 3: Example course for your Microlearning / Final exam at the end of the course
Overview: The Finished Course
An online course following the Microlearning method consists of many small, very precise learning units. How extensive the entire course should be depends on you and the content you want to convey. So if you combine various media, your entire online course could look something like this – of course, you can also add more chapters:

Own illustration 4: Example course for your Microlearning / Your finished course
Conclusion
Microlearning works especially well when learning content is consistently structured into short, clearly defined units that are easy to consume and can be repeated at any time.
Building a Microlearning course is less complicated than many think. The key is primarily that each learning unit conveys a clear core message and focuses on the essentials. Small learning bites help keep the attention and motivation of course participants high.
Additionally, if you combine different media, such as videos, quizzes, or graphics, you create a varied learning process. Short units are also easier to integrate into everyday life and ensure that knowledge is built step by step.
With a clear structure consisting of an introduction, several short learning units, and a concluding test, you create a Microlearning course that efficiently conveys knowledge while also fitting well into your participants' learning routines.
Updated on 06.03.2026